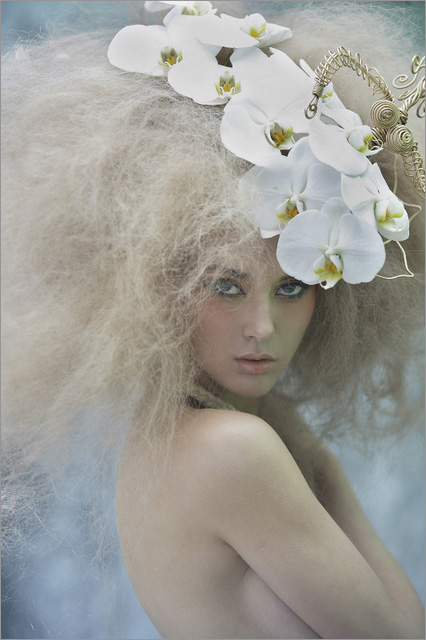
先来看看原图和最终的效果图对比吧:
原图
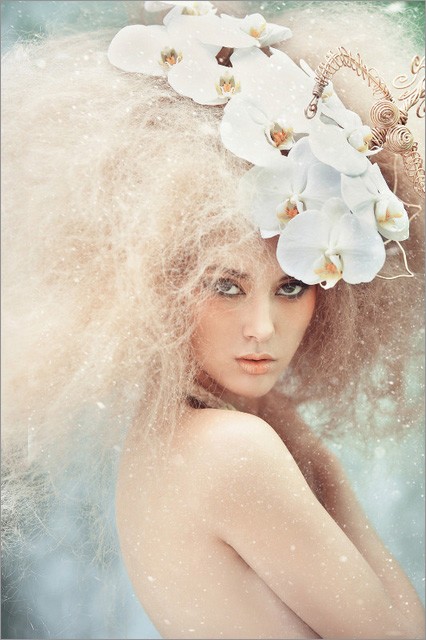
最终效果
1、使用图章磨皮,也可以使用一些插件,磨皮的方式方法有很多,只要能达到所需要的效果都是好的方法,重要的是找到其中一个适合你。
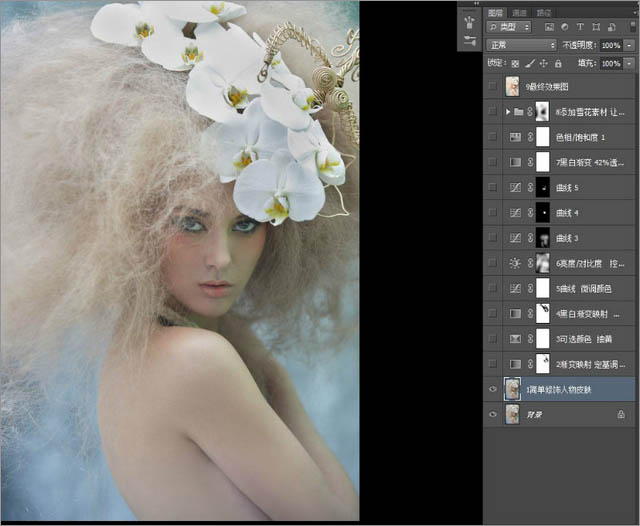
2、用渐变映射(黄橙色),这一步是确定图片的基调,图层模式为滤色,不透明度14%。
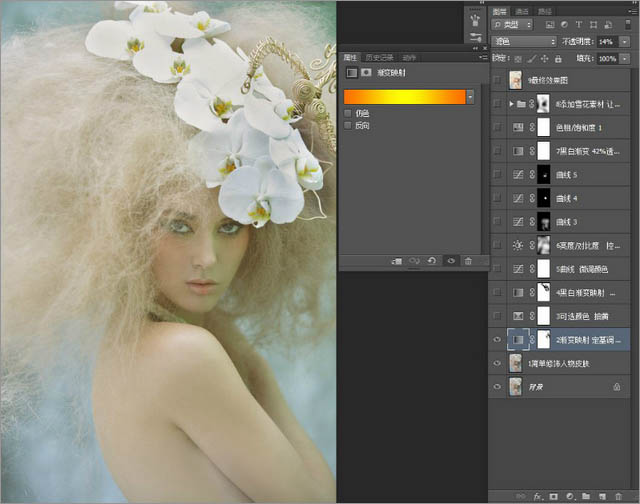
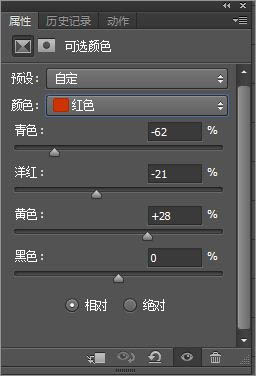
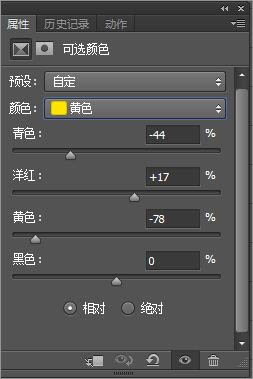
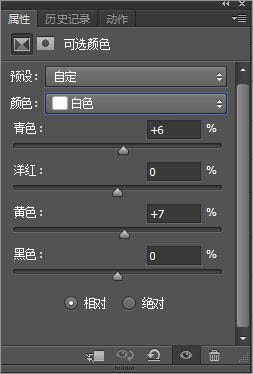
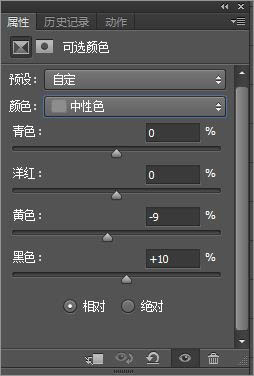
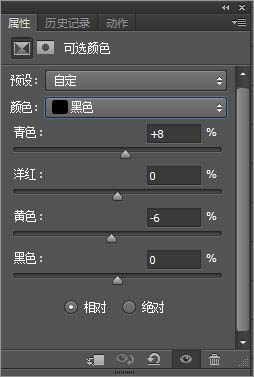
3、调整可选颜色:红色(-62、-21、28、0)、黄色(-44、17、-78、0)、白色(6、0、7、0)、中性色(0、0、-9、10)、黑色(8、0、-6、0)这里的数据只作为参考,实际操作时应根据需要调整。
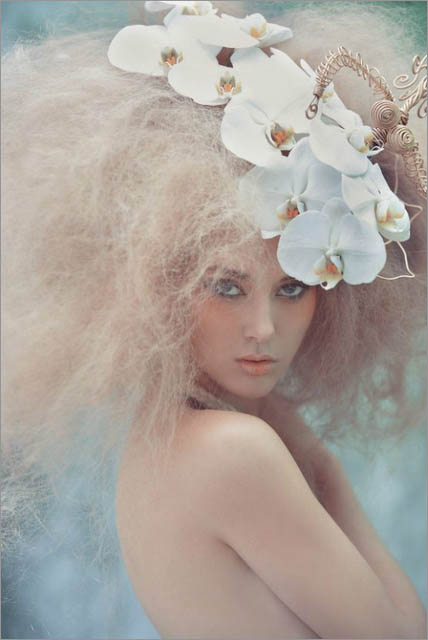
原图

最终效果

1、使用图章磨皮,也可以使用一些插件,磨皮的方式方法有很多,只要能达到所需要的效果都是好的方法,重要的是找到其中一个适合你。

2、用渐变映射(黄橙色),这一步是确定图片的基调,图层模式为滤色,不透明度14%。

3、调整可选颜色:红色(-62、-21、28、0)、黄色(-44、17、-78、0)、白色(6、0、7、0)、中性色(0、0、-9、10)、黑色(8、0、-6、0)这里的数据只作为参考,实际操作时应根据需要调整。


标签:照片处理