


很多人认为调整边缘是抽出滤镜的替代品,其实背景橡皮擦工具才更适合,并且功能更强大,使用更方便。
背景橡皮擦工具功能非常强大也非常灵活,擦除的范围我们可以精准的用前景色和背景色 + 容差来控制,可以完美的保护发丝,更彻底把背景色清除干净;并且速度极快,背景稍简单的图片只需几十秒就可以。
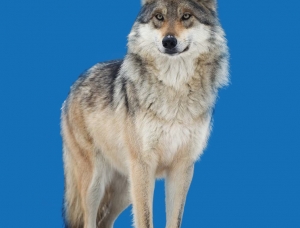
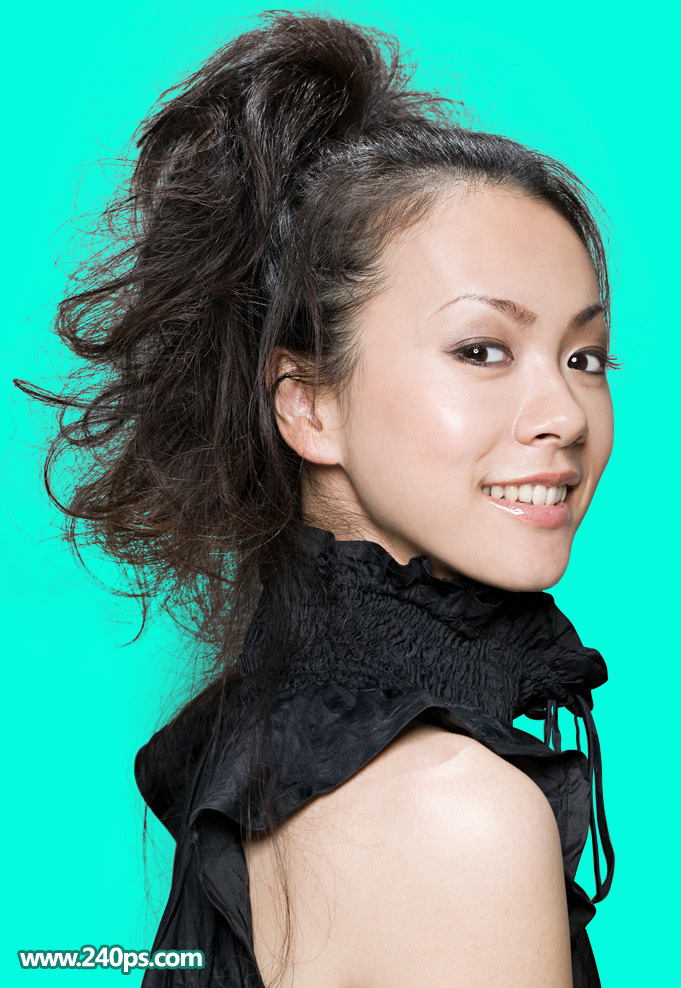
原图
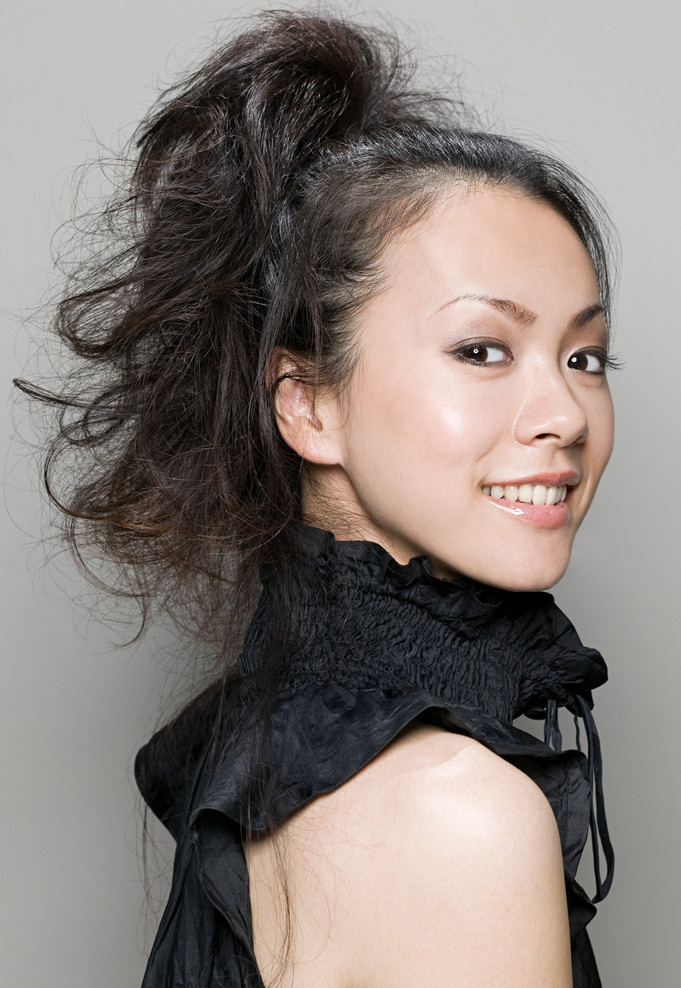
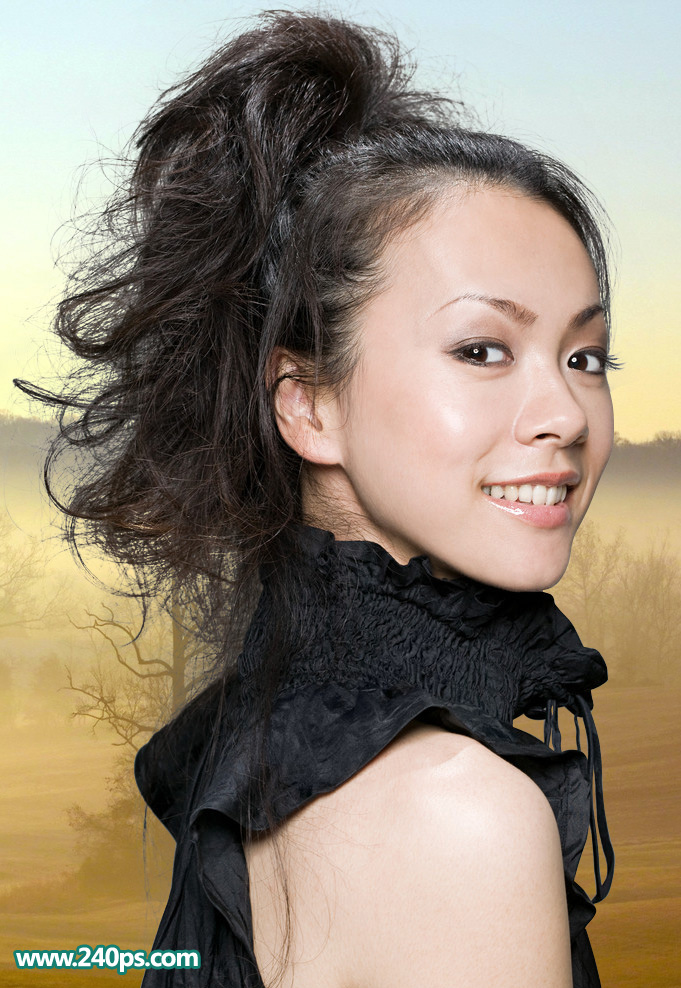
最终效果
更换背景图片
1、把原图素材保存到本机,再用PS打开。
首先我们来初略认识背景橡皮擦工具,在工具箱中找到这款工具,我们在属性栏可以看到“取样:背景色版”,容差,保护前景色的选项,这些都是非常实用的选项,如果对这款工具还不了解,可以到新手入门栏目查看详细的视频教程。
2、我们分析一下原图,左下部区域背景明显偏暗,处理之前,我们最好把背景色调整均匀,这样就可以一步到位。

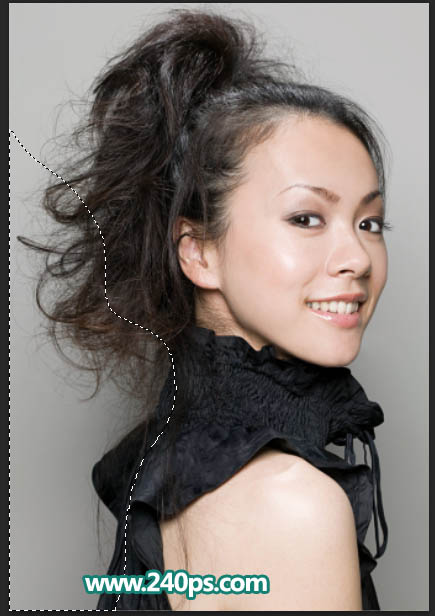
3、用套索工具勾出出较暗的区域,如下图。
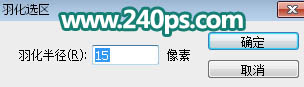
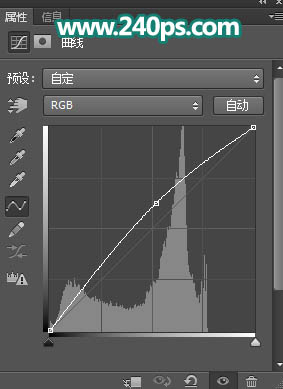
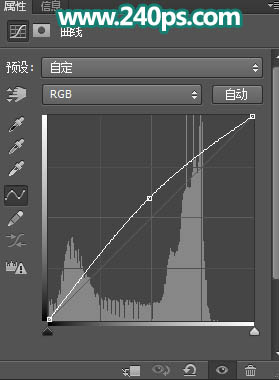
4、Shift + F6把选区羽化15个像素,然后创建曲线调整图层,稍微调亮一点,参数及效果如下图。
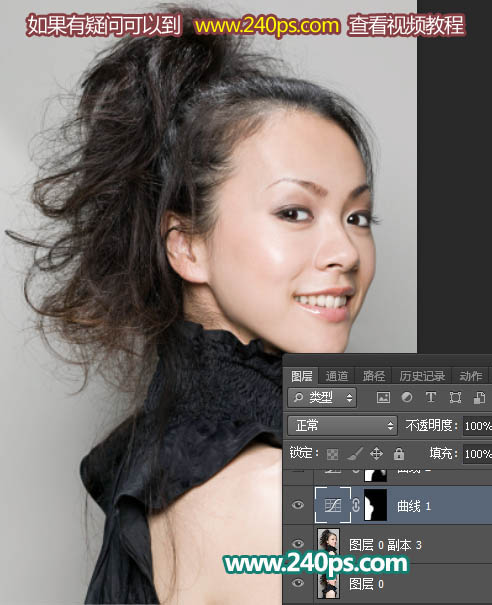
5、局部还有偏暗的部分,用套索工具选取如下图,羽化15个像素后创建曲线调整图层,调亮一点,局部有偏暗的部分可以用柔边白色画笔稍微涂抹一下。
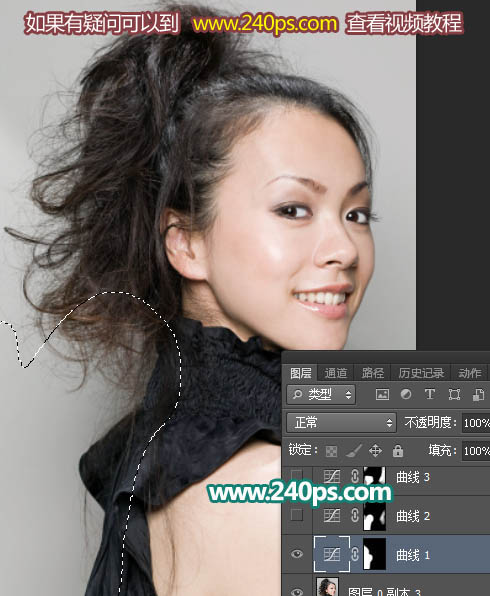
6、这个区域还是有点暗,再用调色工具选取,羽化15个像素。
7、创建曲线调整图层,稍微调亮一点,确定后再用柔边白色画笔把图片其他部分偏暗的部分稍微涂亮,如下图。
8、新建一个图层,按Ctrl + Alt + Shift + E 盖印图层,如下图。

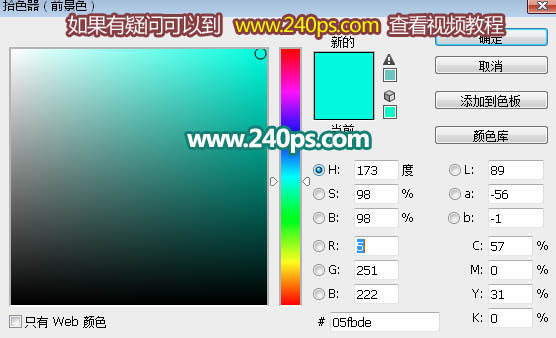
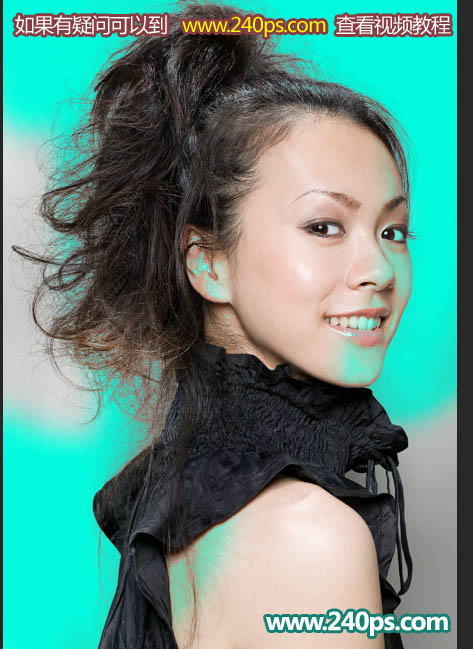
9、在盖印图层的下面新建一个图层,用油漆桶工具填充青色:#05fbde,如下图。
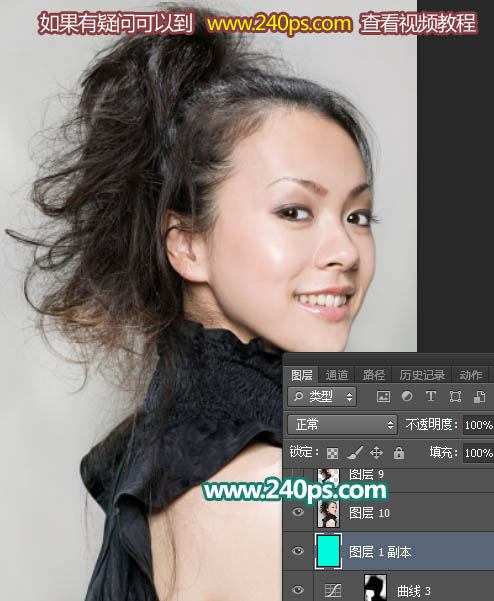
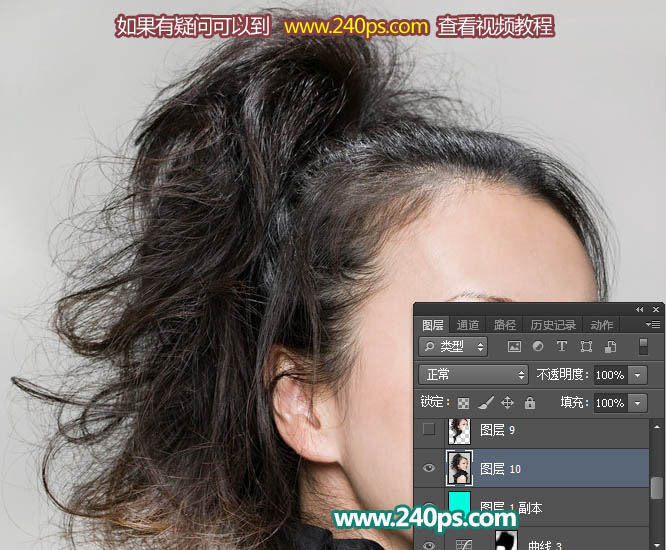
10、回到盖印图层,如下图。
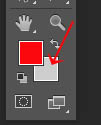
11、在工具箱里面选择吸管工具,按住Alt键,然后在下面的红圈位置点一下,吸取背景色。
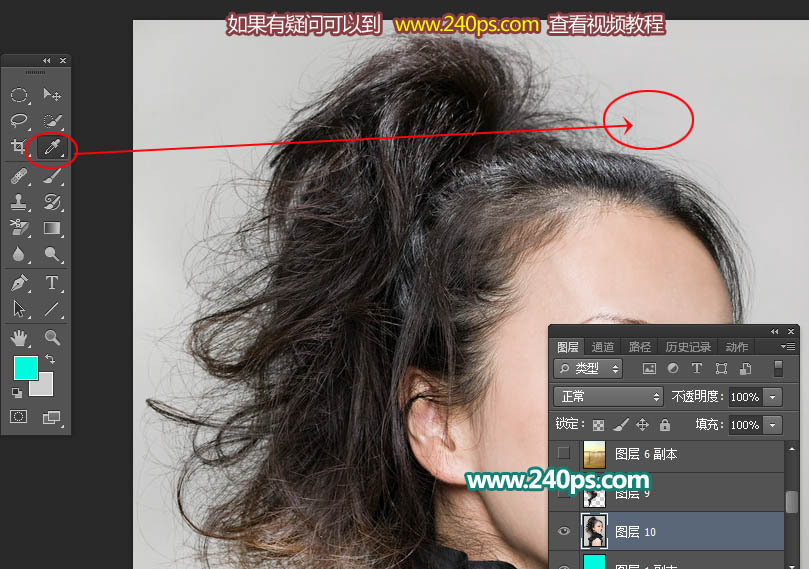
12、这时候我们把颜色吸取到了背景色中,如下图。
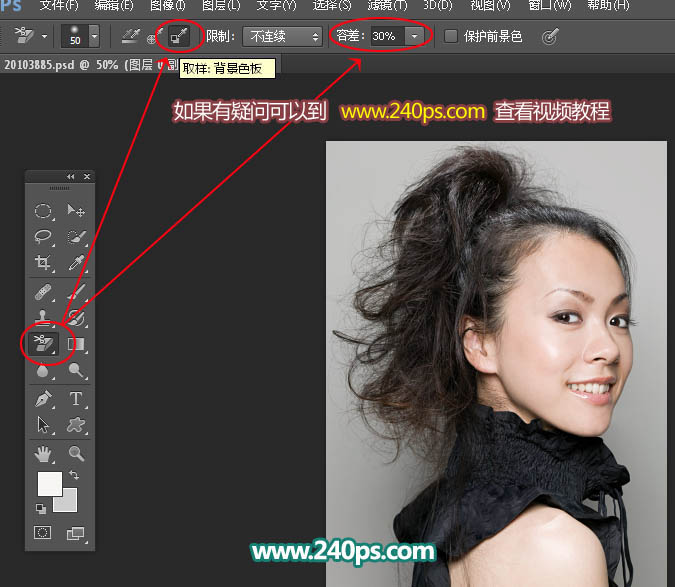
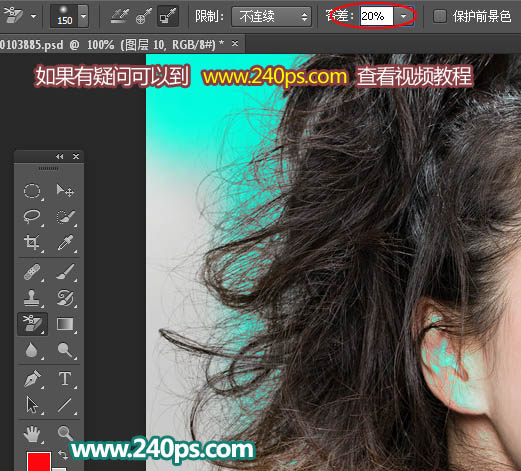
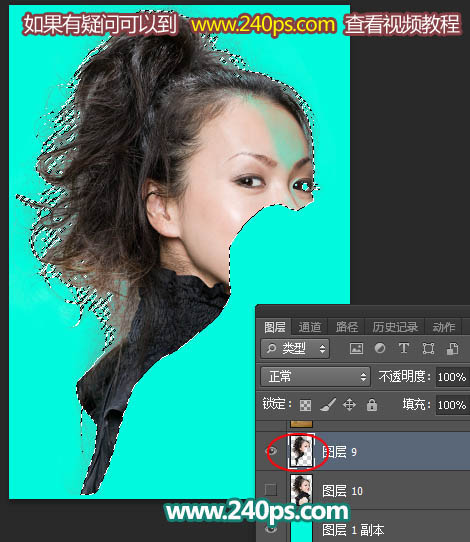
13、选择背景橡皮擦工具,在属性栏勾选下面的选项,容差设置为30%,如下图。
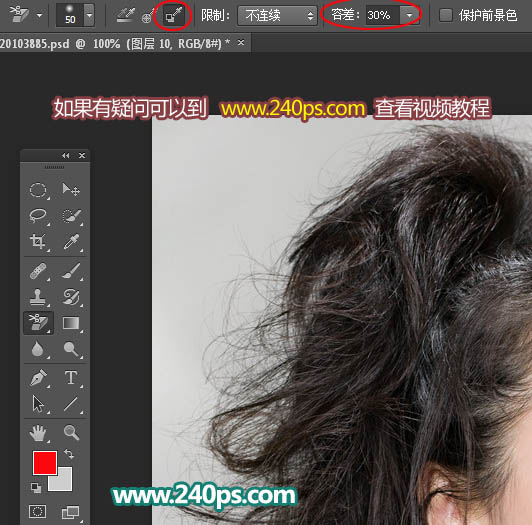
14、在背景上涂抹,可以用左右中括号键调整笔触大小,左侧边缘的细发丝区域暂时不用涂抹,如下图。
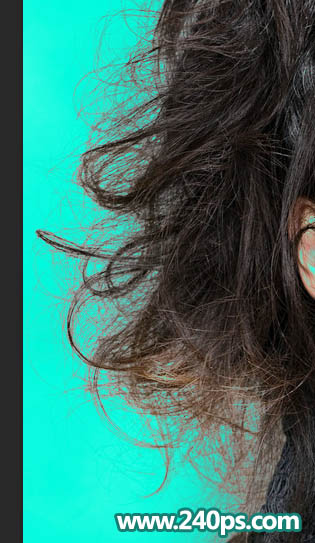
15、在属性栏把容差设置为20%,如下图。这样可以保留更多发丝细节。
16、把剩下的背景擦除,发丝细节完好保留,如下图。
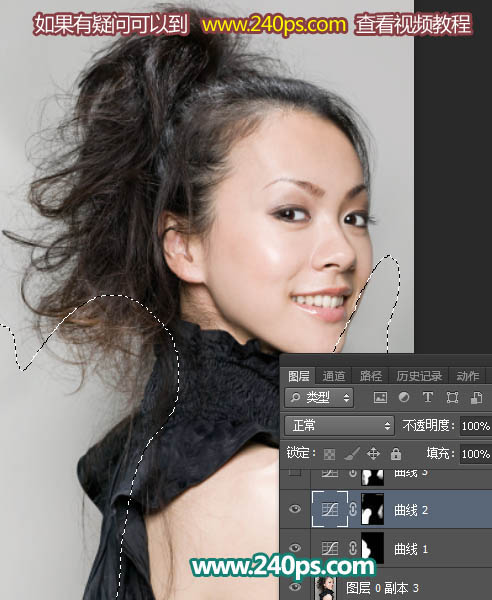
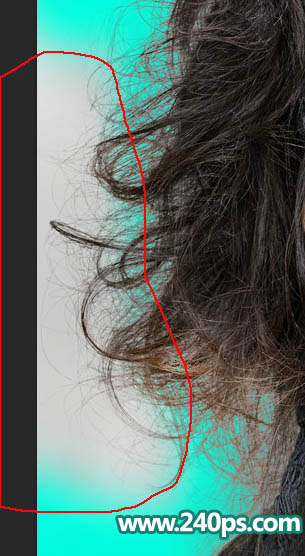
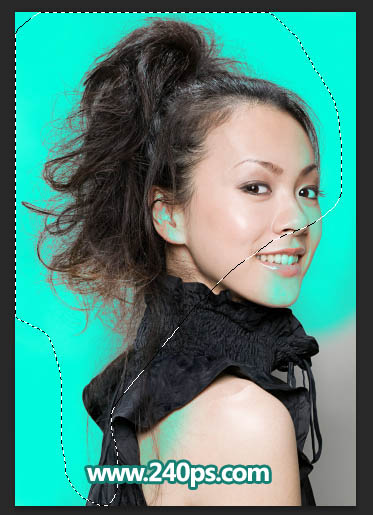
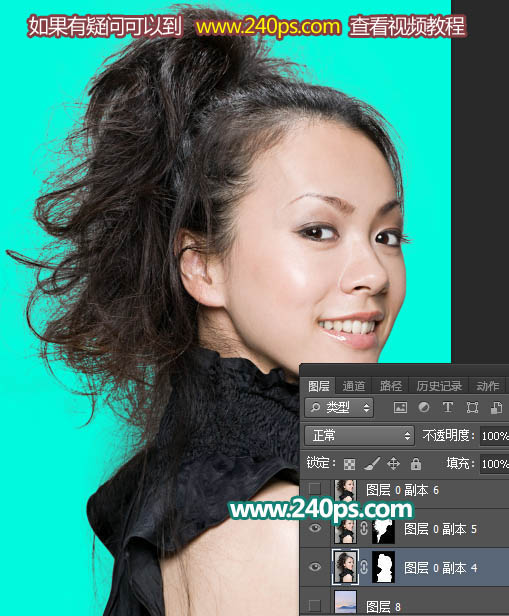
17、用套索工具把发丝区域选取出来,如下图,并按Ctrl + J 复制到新的图层。
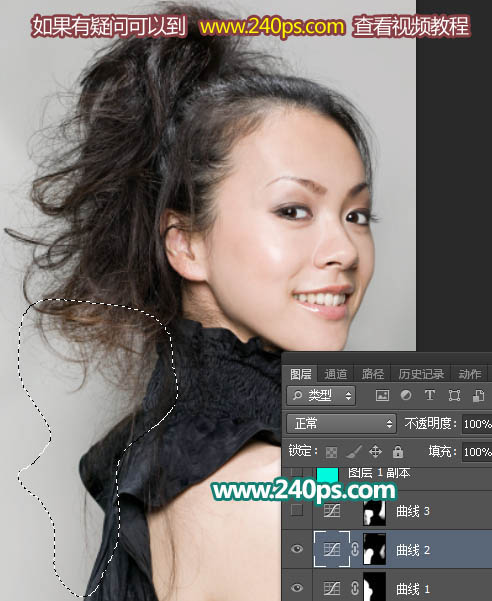
18、把下面的图层隐藏,效果如下图。
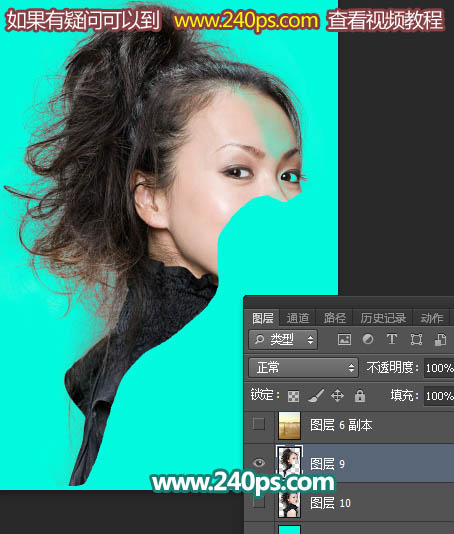
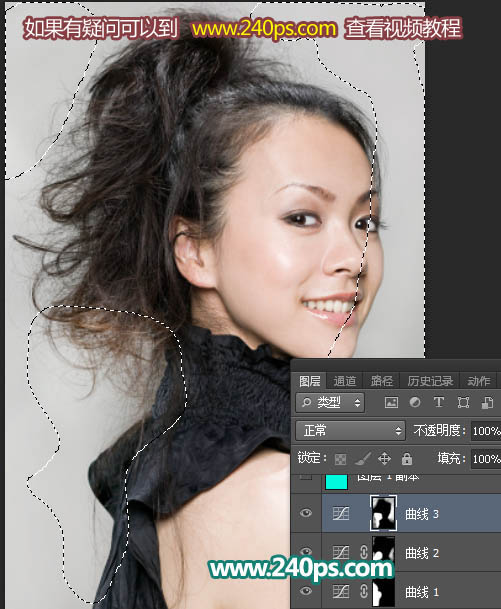
19、按住Ctrl + 鼠标左键点击当前图层缩略图载入选区,如下图。
20、把背景图层复制一层,添加图层蒙版,并按Ctrl + Shift + ] 置顶,再把原复制的图层隐藏。因为之前我们调整了明暗,这样可以完美恢复。

21、把背景图层复制一层,按ctrl + Shift + ] 置顶,用钢笔工具把人物轮廓部分勾出来,转为选区后添加图层蒙版。

22、这是我们现在的效果,发丝细节保持完好。
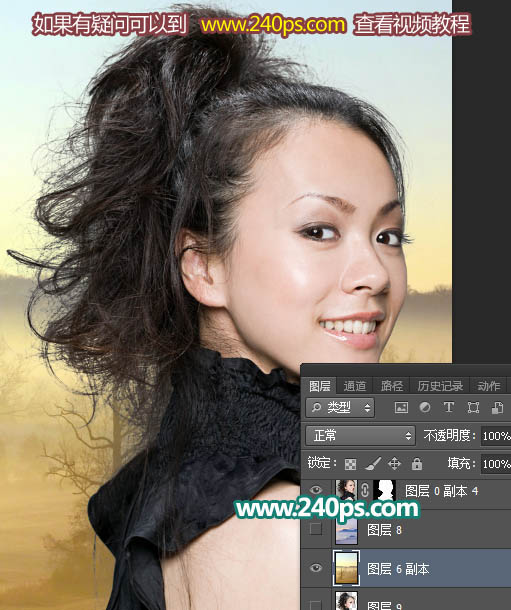
23、更换一张背景图片,基本不用其他处理,背景图片在视频教程里面。
最终效果:
背景橡皮擦工具功能非常强大也非常灵活,擦除的范围我们可以精准的用前景色和背景色 + 容差来控制,可以完美的保护发丝,更彻底把背景色清除干净;并且速度极快,背景稍简单的图片只需几十秒就可以。
原图

最终效果

更换背景图片

1、把原图素材保存到本机,再用PS打开。
首先我们来初略认识背景橡皮擦工具,在工具箱中找到这款工具,我们在属性栏可以看到“取样:背景色版”,容差,保护前景色的选项,这些都是非常实用的选项,如果对这款工具还不了解,可以到新手入门栏目查看详细的视频教程。

2、我们分析一下原图,左下部区域背景明显偏暗,处理之前,我们最好把背景色调整均匀,这样就可以一步到位。

3、用套索工具勾出出较暗的区域,如下图。

4、Shift + F6把选区羽化15个像素,然后创建曲线调整图层,稍微调亮一点,参数及效果如下图。


5、局部还有偏暗的部分,用套索工具选取如下图,羽化15个像素后创建曲线调整图层,调亮一点,局部有偏暗的部分可以用柔边白色画笔稍微涂抹一下。


6、这个区域还是有点暗,再用调色工具选取,羽化15个像素。

7、创建曲线调整图层,稍微调亮一点,确定后再用柔边白色画笔把图片其他部分偏暗的部分稍微涂亮,如下图。

8、新建一个图层,按Ctrl + Alt + Shift + E 盖印图层,如下图。

9、在盖印图层的下面新建一个图层,用油漆桶工具填充青色:#05fbde,如下图。


10、回到盖印图层,如下图。

11、在工具箱里面选择吸管工具,按住Alt键,然后在下面的红圈位置点一下,吸取背景色。

12、这时候我们把颜色吸取到了背景色中,如下图。

13、选择背景橡皮擦工具,在属性栏勾选下面的选项,容差设置为30%,如下图。

14、在背景上涂抹,可以用左右中括号键调整笔触大小,左侧边缘的细发丝区域暂时不用涂抹,如下图。


15、在属性栏把容差设置为20%,如下图。这样可以保留更多发丝细节。

16、把剩下的背景擦除,发丝细节完好保留,如下图。

17、用套索工具把发丝区域选取出来,如下图,并按Ctrl + J 复制到新的图层。

18、把下面的图层隐藏,效果如下图。

19、按住Ctrl + 鼠标左键点击当前图层缩略图载入选区,如下图。

20、把背景图层复制一层,添加图层蒙版,并按Ctrl + Shift + ] 置顶,再把原复制的图层隐藏。因为之前我们调整了明暗,这样可以完美恢复。

21、把背景图层复制一层,按ctrl + Shift + ] 置顶,用钢笔工具把人物轮廓部分勾出来,转为选区后添加图层蒙版。

22、这是我们现在的效果,发丝细节保持完好。

23、更换一张背景图片,基本不用其他处理,背景图片在视频教程里面。

最终效果:

扫码关注公众号 获取更多设计资源...
↓↓↓
【白嫖福利 | 限时领取】
摹客超级版会员(价值1250元)解锁摹客协作、摹客RP、摹客DT所有功能。
公众号主页发送 “激活” 免费获取 激活码
↓↓↓
公众号主页发送 “字体” 获取 全套可商用字体包...
↓↓↓
公众号主页发送 “vi” 获取 500个著名品牌vi设计手册...
↓↓↓
【白嫖福利 | 限时领取】
摹客超级版会员(价值1250元)解锁摹客协作、摹客RP、摹客DT所有功能。
公众号主页发送 “激活” 免费获取 激活码
↓↓↓
公众号主页发送 “字体” 获取 全套可商用字体包...
↓↓↓
公众号主页发送 “vi” 获取 500个著名品牌vi设计手册...