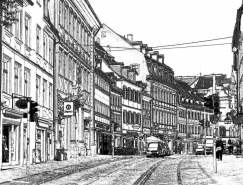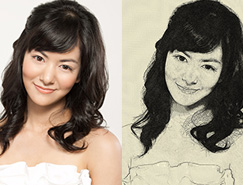


动画片场景都是手绘的,在转这种效果的时候,要用滤镜等把平常的风景图片转为类似手绘效果,然后上色,处理好局部明暗,并增加一些装饰即可。
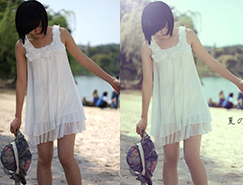
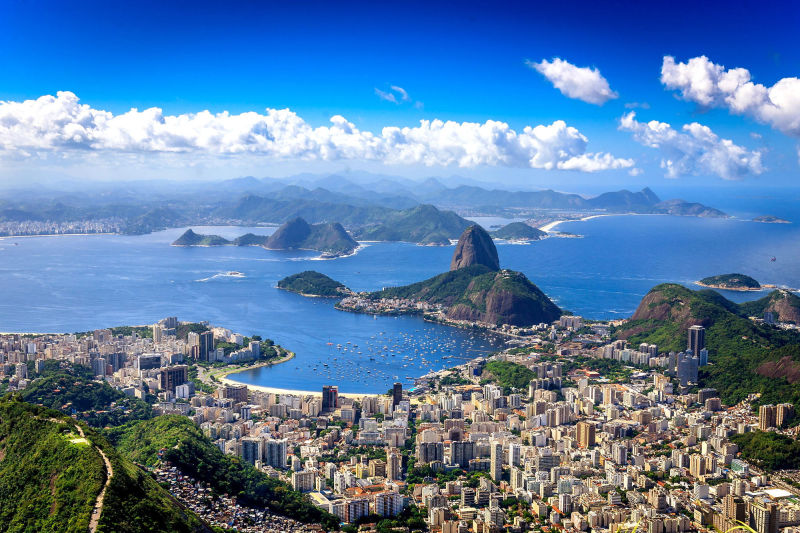
原图
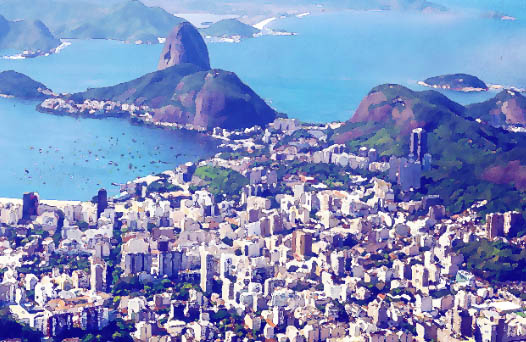
最终效果
1、找一张漂亮的风景照片,美丽的海滩。
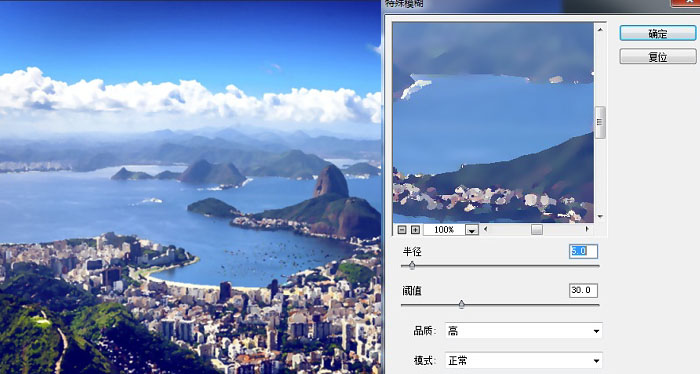
2、打开PS做效果把图片放进去然后ctrl+j复制一层,添加滤镜-模糊-特殊模糊。
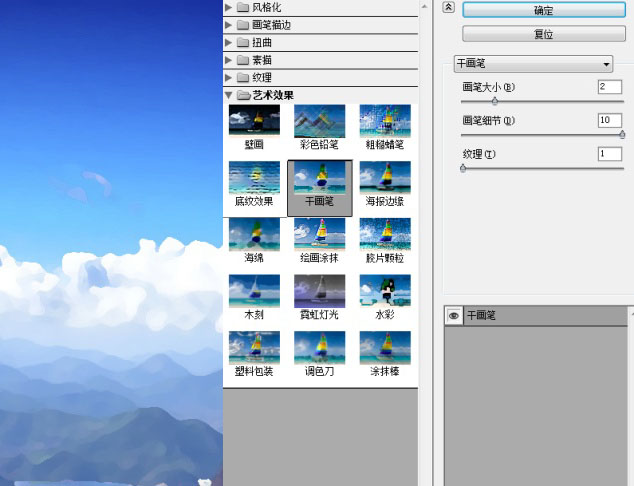
3、然后在这个图层的基础上添加滤镜-滤镜库-干画笔效果。
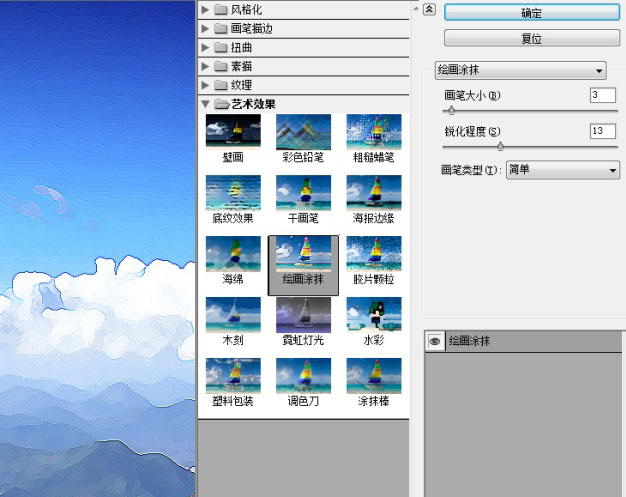
4、这个时候呢复制一层背景图片,把图层提到干画笔图层上面,再添加滤镜-滤镜库-绘画涂抹效果。
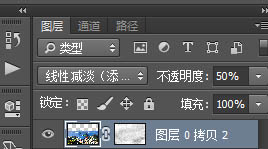
5、把这个绘画涂抹图层设置成线性减淡,并根据效果调整图层透明度。这里我加了一点蒙版……有些颜色有点过了……
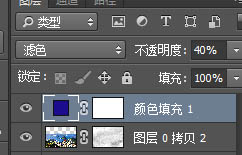
6、这个时候画面是不是暗部太黑了呢?没事,加一个纯色。
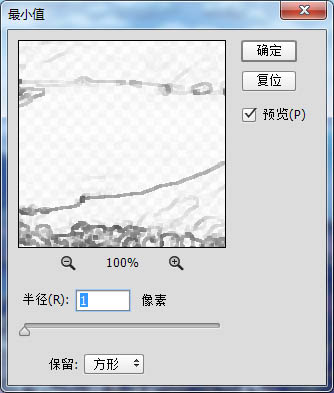
7、最重要的一步,是不是发现图片轮廓特别的模糊呢,别急;
简化一下步骤 ctrl+j复制背景层,ctrl+shift+u 去色,ctrl+j复制一层,图层属性改为线性减淡;ctrl+i反相,滤镜-其他-最小值,ctrl+e向下合并,调整图层属性为正片叠底。
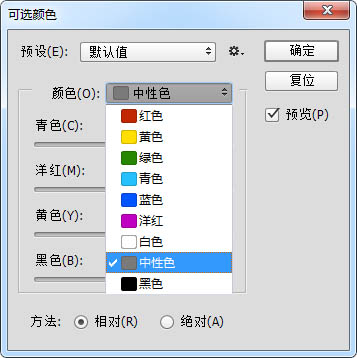
8、找到刚才干画笔滤镜效果那个图层,根据照片调整一下整体的色调,图像-调整=可选颜色,这里我着重调整了中性色和白色(这个根据自己的喜好 哈哈 跟着感觉走)。然后盖印所以图层效果ctrl+shift+alt+e。
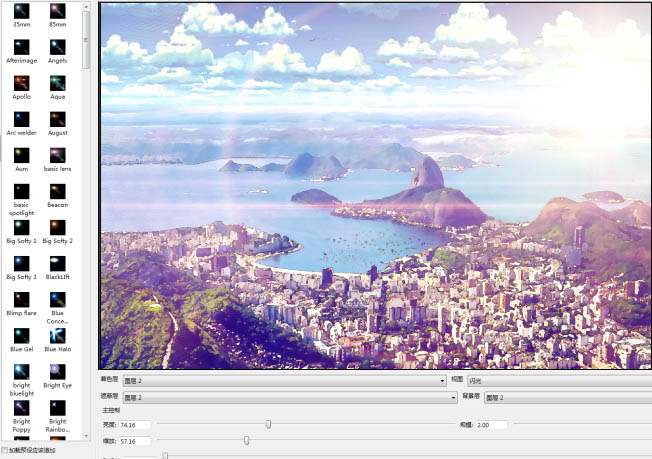
9、最后一步添加镜头光晕,这里我使用了网友推荐的一款神器 Knoll Software,超级好用。
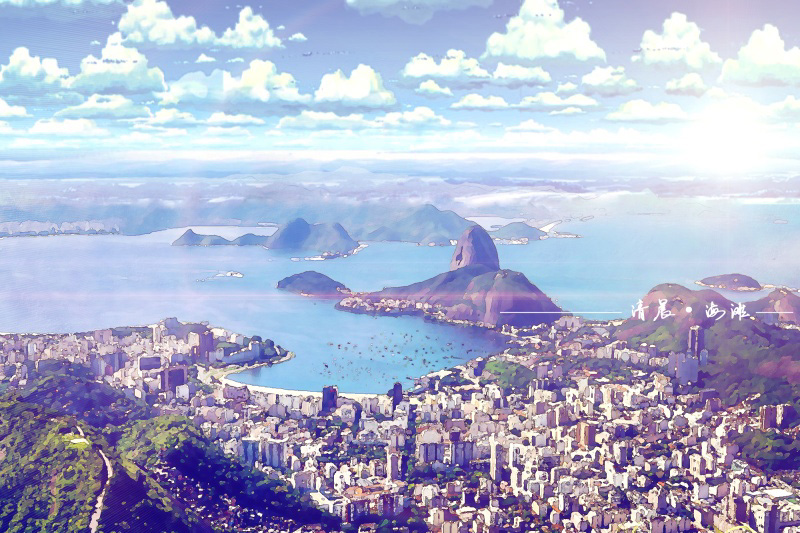
最终效果,天空中的云朵是网上找的素材。
原图

最终效果

1、找一张漂亮的风景照片,美丽的海滩。
2、打开PS做效果把图片放进去然后ctrl+j复制一层,添加滤镜-模糊-特殊模糊。

3、然后在这个图层的基础上添加滤镜-滤镜库-干画笔效果。

4、这个时候呢复制一层背景图片,把图层提到干画笔图层上面,再添加滤镜-滤镜库-绘画涂抹效果。

5、把这个绘画涂抹图层设置成线性减淡,并根据效果调整图层透明度。这里我加了一点蒙版……有些颜色有点过了……

6、这个时候画面是不是暗部太黑了呢?没事,加一个纯色。

7、最重要的一步,是不是发现图片轮廓特别的模糊呢,别急;
简化一下步骤 ctrl+j复制背景层,ctrl+shift+u 去色,ctrl+j复制一层,图层属性改为线性减淡;ctrl+i反相,滤镜-其他-最小值,ctrl+e向下合并,调整图层属性为正片叠底。


8、找到刚才干画笔滤镜效果那个图层,根据照片调整一下整体的色调,图像-调整=可选颜色,这里我着重调整了中性色和白色(这个根据自己的喜好 哈哈 跟着感觉走)。然后盖印所以图层效果ctrl+shift+alt+e。

9、最后一步添加镜头光晕,这里我使用了网友推荐的一款神器 Knoll Software,超级好用。

最终效果,天空中的云朵是网上找的素材。

扫码关注公众号 获取更多设计资源...
↓↓↓
【白嫖福利 | 限时领取】
摹客超级版会员(价值1250元)解锁摹客协作、摹客RP、摹客DT所有功能。
公众号主页发送 “激活” 免费获取 激活码
↓↓↓
公众号主页发送 “字体” 获取 全套可商用字体包...
↓↓↓
公众号主页发送 “vi” 获取 500个著名品牌vi设计手册...
↓↓↓
【白嫖福利 | 限时领取】
摹客超级版会员(价值1250元)解锁摹客协作、摹客RP、摹客DT所有功能。
公众号主页发送 “激活” 免费获取 激活码
↓↓↓
公众号主页发送 “字体” 获取 全套可商用字体包...
↓↓↓
公众号主页发送 “vi” 获取 500个著名品牌vi设计手册...
标签:PS滤镜