图层样式能制作出多种不同的特殊效果,本实例制作的文字通过浮雕效果、颜色叠加、图案叠加制作出文字特效,如果将这种效果将制作得到的文字运用到设计中,将会是非常漂亮的艺术效果。先来看看完成的文字效果。


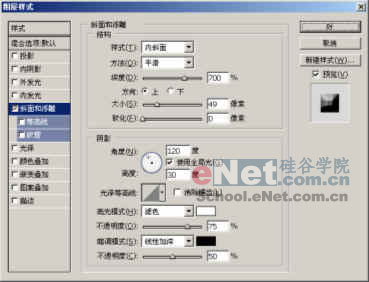
(4)选择“图层/图层样式/斜面和浮雕”命令,开启“图层样式”对话框,在对话框中设置浮雕样式,得到浮雕文字效果。

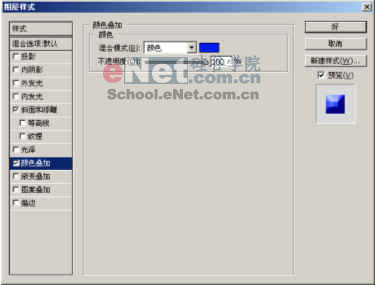
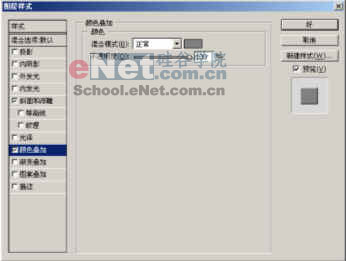
(5)再选择“图层/图层样式/颜色叠加”命令,在开启的“图层样式”对话框中选择混合模式为颜色,单击混合模式旁边的色块,开启“拾色器”对话框,在对话框中设置叠加颜色为#001BE9,文字又有了新的变化。

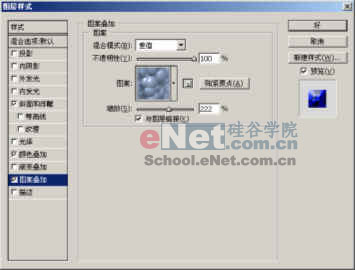
(6)在“图层样式”中继续对文字做设置,设置混合模式为差值。然后勾选图案叠加选项,单击图案右侧的三角形按钮,在弹出的面板中选择第一个图案。 现在的文字效果变的丰富的多了。


(8)新建图层1。按住“Ctrl”键单击图层1,载入图层1的选区。然后切换到路径面板中单击面板下方的 按钮,将选区转换为路径。

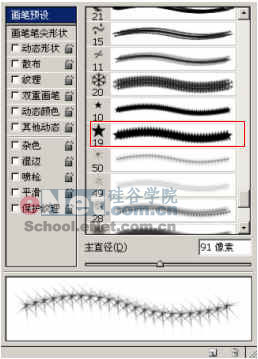
(9)接着就该填充路径了。用画笔工具 ,在属性栏中开启画笔面板,在画笔笔尖形状中设置画笔及画笔间距。然后在前景色中随意设置一个颜色,单击路径面板底部的 按钮,用画笔描边路径。
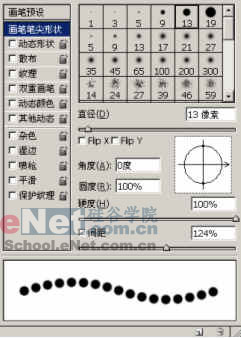

又要提醒大家了,在设置画笔时应根据画笔的大小设置画笔的间距,这样绘制出来的图像才是最佳的。
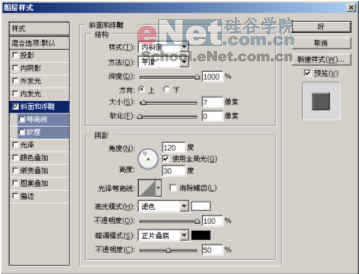
(10)选择“图层/图层样式/斜面和浮雕”命令,设置浮雕参数。然后再勾选颜色叠加选项,在面板中设置叠加颜色为#808080。


(12)选择“图层/新调整图层/色相/饱和度”命令,用与上一步同样的方法开启“色相/饱和度”对话框,在对话框中勾选着色选项进行色相的调整。

(13)新建图层2。选取画笔工具,单击属性栏中的喷枪 按钮,在画笔面板中设置画笔类型,设置前景色为白色,在图中多次单击鼠标左键,为文字加上高光效果。完成本实例最终效果。

最后提醒大家,如果当前画笔面板中没有所需的画笔,可以单击画笔面板旁边的小三角形,在弹出的菜单中追加各种画笔样式。

下面就跟我一起学做效果吧。
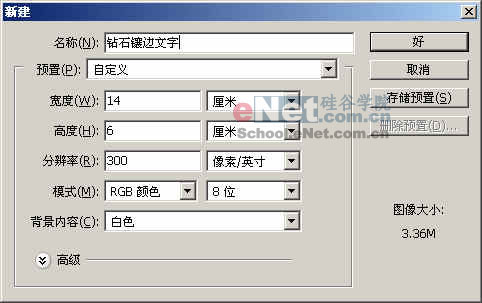
(1)选择“新建/文件”命令,开启“新建”对话框,在对话框中设置“宽度”为14厘米,“高度”为6厘米。

(2)选取渐变工具 ,单击属性栏中的渐变编辑器按钮,在开启的对话框中设置渐变颜色为从#000C83到#C6C7F9。然后按下属性栏中的径向渐变按钮,拖曳鼠标填充背景图层中,得到渐变背景。


(3)在画面中输入英文字母:ASP。这里要提醒大家,由于在下面的步骤中将要对文字做颜色叠加效果,所以这里对文字任意填充一个颜色即可。

(4)选择“图层/图层样式/斜面和浮雕”命令,开启“图层样式”对话框,在对话框中设置浮雕样式,得到浮雕文字效果。


(6)在“图层样式”中继续对文字做设置,设置混合模式为差值。然后勾选图案叠加选项,单击图案右侧的三角形按钮,在弹出的面板中选择第一个图案。 现在的文字效果变的丰富的多了。


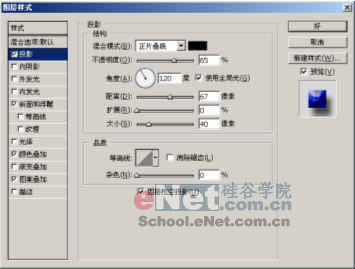
(7)勾选投影选项,在对话框中设置投影为黑色,完成文字的效果设置。


(8)新建图层1。按住“Ctrl”键单击图层1,载入图层1的选区。然后切换到路径面板中单击面板下方的 按钮,将选区转换为路径。


又要提醒大家了,在设置画笔时应根据画笔的大小设置画笔的间距,这样绘制出来的图像才是最佳的。
(10)选择“图层/图层样式/斜面和浮雕”命令,设置浮雕参数。然后再勾选颜色叠加选项,在面板中设置叠加颜色为#808080。


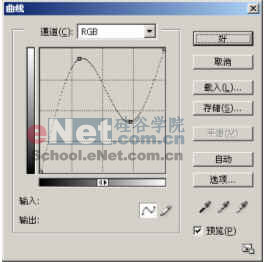
(11)选择“图层/新调整图层/曲线”命令,开启“新图层”对话框,单击“好”按钮后将弹出“曲线”对话框,调整曲线。


(12)选择“图层/新调整图层/色相/饱和度”命令,用与上一步同样的方法开启“色相/饱和度”对话框,在对话框中勾选着色选项进行色相的调整。

(13)新建图层2。选取画笔工具,单击属性栏中的喷枪 按钮,在画笔面板中设置画笔类型,设置前景色为白色,在图中多次单击鼠标左键,为文字加上高光效果。完成本实例最终效果。


最后提醒大家,如果当前画笔面板中没有所需的画笔,可以单击画笔面板旁边的小三角形,在弹出的菜单中追加各种画笔样式。
标签:钻石镶边文字