


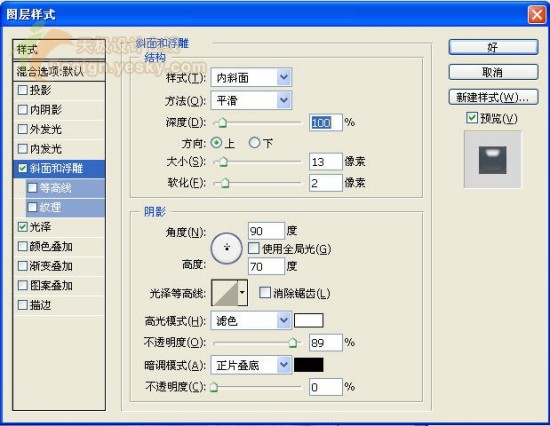
7、双击图层1,进入图层样式对话框中,勾选光泽,设置参数如图08所示,其中颜色的RGB分别为120、180、240。

8、选择斜面和浮雕样式,设置参数如图09所示。
9、选择内发光样式,设置参数如图10所示,其中内发光颜色的RGB值分别为62、133、183。
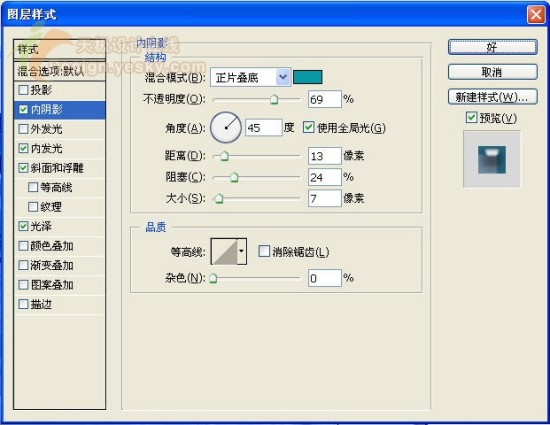
10、选择内阴影样式,设置参数如图11所示,其中内阴影颜色的RGB值为4、155、165。
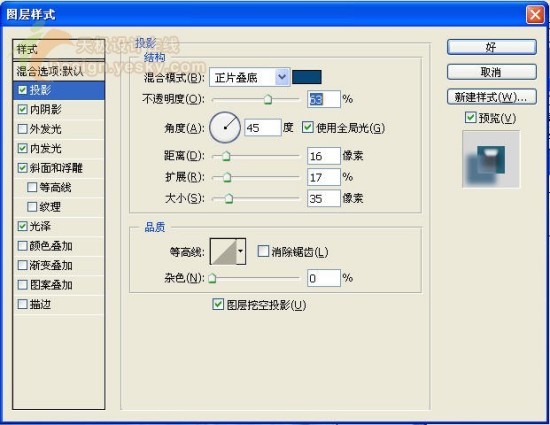
最后选择阴影样式,设置参数如图12所示,其中阴影的RGB分别为4、72、119。
11、单击确定,最终效果如图13所示。


扫码关注公众号 获取更多设计资源...
↓↓↓
【白嫖福利 | 限时领取】
摹客超级版会员(价值1250元)解锁摹客协作、摹客RP、摹客DT所有功能。
公众号主页发送 “激活” 免费获取 激活码
↓↓↓
公众号主页发送 “字体” 获取 全套可商用字体包...
↓↓↓
公众号主页发送 “vi” 获取 500个著名品牌vi设计手册...
↓↓↓
【白嫖福利 | 限时领取】
摹客超级版会员(价值1250元)解锁摹客协作、摹客RP、摹客DT所有功能。
公众号主页发送 “激活” 免费获取 激活码
↓↓↓
公众号主页发送 “字体” 获取 全套可商用字体包...
↓↓↓
公众号主页发送 “vi” 获取 500个著名品牌vi设计手册...
标签:字